Showing posts with label Beauty. Show all posts

Tuesday, 6 December 2016

TRND Beauty X Morphe Brushes!


Hey everybody!
I'm back with something VERRRY Exciting!

By now I'm sure everybody and their mother's have heard bloggers, YouTubers & everyone that doesn't live under a rock raving about Morphe Brushes. The amazing quality brand with even more amazing prices, They really blew up when they released their 350 Palette. I have this palette myself & have raved about it and I have to say it's absolutely one of the best I've ever used! And the shades are just to die for!


And the best part is they're all under 30 Euro!! Shur where would ya be going?
They have an incredible range of brushes, highlighters, Concealers, Travel cases..the list goes on!
Anyways, Morphe is located In Burbank CA so for a long time you could only buy off their website, that's what I did to get the 350 palette and I was stung big time by custom charges so I ended up paying nearly double for the pallet!

Now when I saw that there is an Irish company now stocking Morphe, safe to say I nearly passed out.
TRND Beauty based in Dublin are now selling the amazing brand online!
Unfortunately & Unsurprisingly they majority of the most popular palettes are currently sold out, but you can join a wait list!
So I was browsing Sunday night and noticed they have a lot of their new pressed pigments in stock, which are getting amazing reviews on YouTube!
They are 7.99 each and they are in a huge pan.
But I saw this fantastic bundle deal and decided to go for it!


It's Called The Morphe Mixture 
You get: -2 pressed Pigments (Mimosa Sunday & Marry The Night)
-1 M501 Highlighting Brush
-1 Flat M224 brush for packing on the pigment.
All of this for only €25! 

It really is insane value for money, And the pigmentation of the shadows are like nothing I've ever tried, they swatch like butter!


The Lighter Shade is "Mimosa Sunday''
The Darker Shade Is "Marry The Night"
The smallest touch of these shadows go a long, long way and given the size of the pans they will last you forever!
I tried Mimosa Sunday with the M501 Highlighting brush on my cheekbones to see how it would look and oh my lord the wind was nearly taken out of me! It's an absolutely beautiful highlight.
Not glittery or Chalky it looks like you're really lit from within!

I'm so looking forward to playing with these and creating a look with them! I'm definitely going to be purchasing more pigments & brushes in the meantime, I'm just so amazed by them.
This little bundle or even creating your own bundle is a perfect stocking filler for sisters, mothers, best friends, cousins, brother, your dog, your hamster..they'll all appreciate this! haha :)

Last but not least, I ordered these fairly late Sunday night and they arrived today! Tuesday afternoon, so there is still loads of time there before Christmas :) They came beautifully packaged with a little thank you note attached! and with that packaging you can just put it straight under the tree? They're making your life so much easier!!


So there we have it! A game changer for Irish Beauty lovers!
It's amazing to see and Irish company like TRND Beauty doing so well and stocking one of the most in-demand brand's at the moment! They have so many more products on their site that are hard to get in Ireland, keep an eye out for them on Social Media to keep up to date with their deals & stock! and wherever you can try and to Support Irish, cos to be fair we're a mighty crowd :P

Happy Shopping Everyone!

Until the next time!

Kelsey xo


Wednesday, 30 November 2016

SOSU: Highlighter Kit, A Closer look!


Hi Everyone!

As promised I'm sharing a closer look & my opinion on the New SOSU by Suzanne Jackson Highlighter palette!
I've had the palette over a week now as I pre-ordered it on her website last month.
I wanted to do a post on it straight away but I have been working crazy hours and by time I was getting home there was no daylight to take proper photo's, so I thought it best to wait and produce a higher quality post!

Before I share the pictures, I have to say I'm blown away by the quality of the product! You get 6 highlighting shades which are all adaptable to different skin tones, you can use them alone or mix them (which I like to do!) and you can use them as beautiful eye shadows!
The top 3 highlighters are pressed & the bottom 3 are baked, so there really is something for everybody!

Finally, I was amazed to see an actual improvement in regards to the texture on my face when I started using this, which I really wasn't expecting!
I noticed since I started wearing highlighters maybe 2 years ago that I constantly have bumps on both sides of my cheekbones, exactly where I apply Highlighter. But since using this palette I've really noticed a drastic improvement. I don't know why exactly, perhaps it contains less Irritating ingredients as other products I have used or it literally could be a coincidence! I just thought I'd share it with ye because I find it amazing :)

So anyways, onto the photos & swatches!


A Closer Look


Swatches

On The Skin


Above I mixed Moon Sparkle and shooting star & applied it to my cheekbones & tip of my nose using a fan brush. Then the inner eye corner's and brow bone using a definer brush.
There's no edits to the photo's, that's just how intense the highlight is!
I also used Peach smoothie as my eyeshadow base.
I'm also wearing her Carla Lashes if anyone is Interested!

It's currently in Stock in Sam McCauelys & Cloud 10 Beauty and selected Pharmacies. SOSU.ie is under construction for the next few days but you can also purchase from there!
 It retails for only €29.95!
Which is 100% worth the money in my opinion, you're getting 6 stunning shades that you can double up on and use as eye shadows! 
And of course it's always good to support our fellow Irish Women! :)

Hope you all enjoyed this post!
Until the next time :)

Kelsey xo


Monday, 18 April 2016

Review & Photos- He-Shi Dark Foaming Mousse.


Hello strangers! Long time no blog! :(
I have been up to 90 the past 2 months, when i came home from Amsterdam i was straight back into work and found it hard to find time to review products & write good quality posts. I've also started driving in the past few weeks (Finally!) and My boyfriends sister-in-law had a beautiful baby boy at the end of march (who were all in love with!) so it was almost impossible to sit down and focus on writing properly!

But now everything is starting to wind down again and I've had time to review The He-Shi Dark Foaming Mousse! I always saw He-Shi in Pharmacies and floating around social Media, but it was Terrie McEvoy's Posts and snapchat's about the brand which really sparked my interest! 
Let me start off by saying this Isn't as affordable as your Cocoa Brown or Rimmel tan which is what I always went for, so I was a bit apprehensive in purchasing something worth  €32.50 in case it was a let down; but I saw it was reduced in Sam McCauley's to €21.66 so I just took the plunge!
So far I absolutely love it! A little goes a very long way, and it so easy to blend! It claims to be a foaming mousse but its a lot less drying on the skin than some you would find on the market!
It has a lovely fresh smell on application which isn't heavy like most tans. When you leave it develop it does have a fake tan scent but it's the most subtle than any other tan I've used!
It claims on the bottle to last 7-10 days, and I would have to agree, But i would suggest moisturizing every morning or evening to help it fade more naturally and avoid any patchy-ness! 

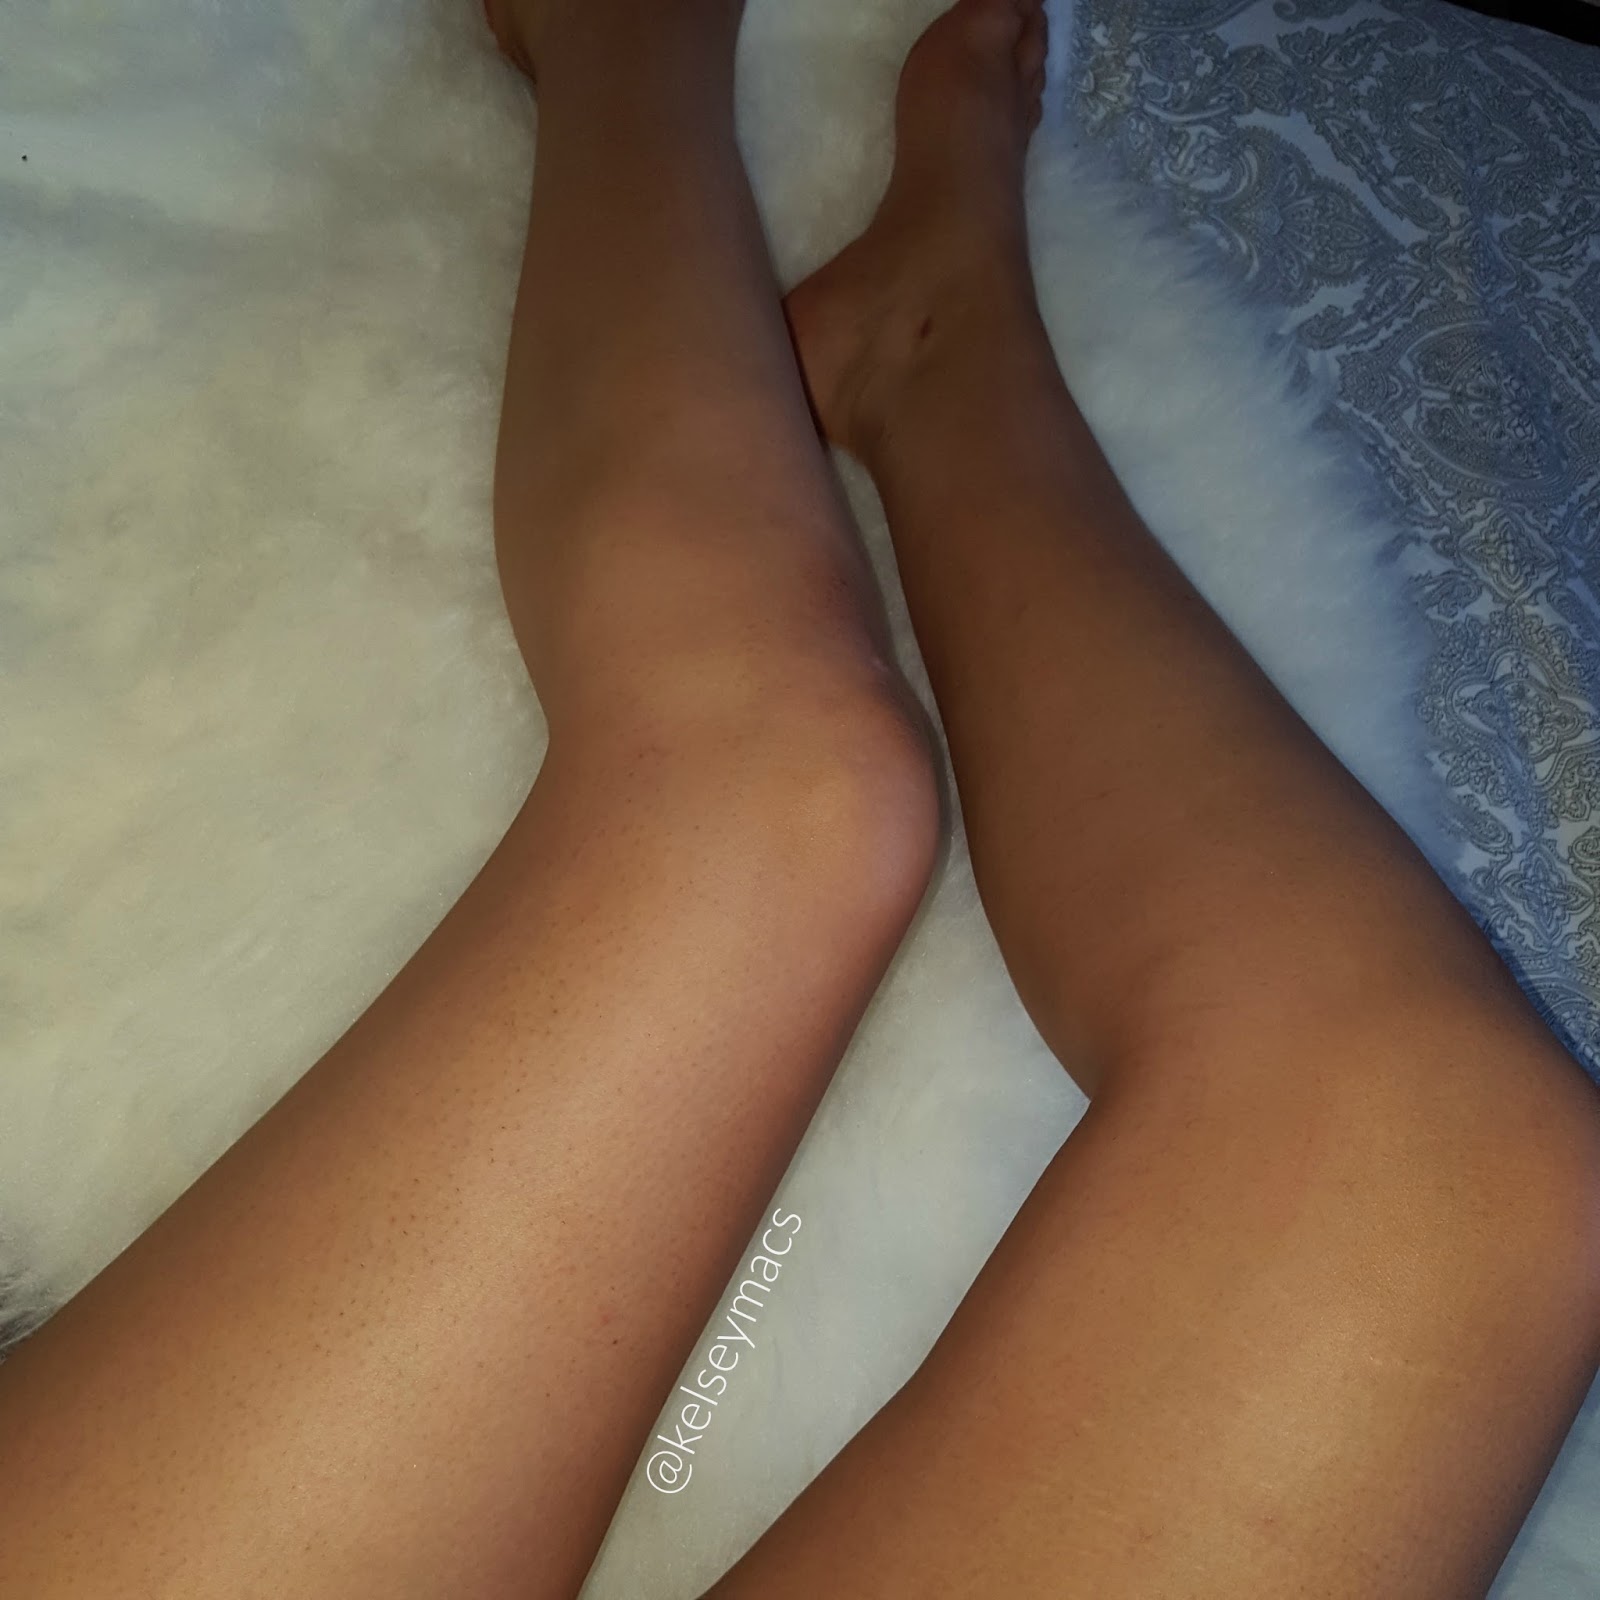
SO! after all that i took a before and after photo of the tan on my legs. I exfoliated and shaved a few hours before applying the tan and Didn't Moisturize. It advises not to moisturize before on the bottle before applying the tan. I also took this photo around 12 hours after application, i applied it before i went to bed to leave it develop nicely! 

Also a breif warning, My legs are RIDICULOUSLY pale naturally so just prepare yourselves gang, haha!


So There ye have it! It pretty much speaks for itself! I was so pale in the first picture I was almost transparent! It came out super even and gave me a really healthy glow. That was taken nearly 5 days ago and it's fading fab! 
It is an expensive tan, there is no denying that! But I'm going to be keeping this one for nights out & special occasions! I'm delighted I took the plunge and used this because I love it!

I can also promise these photo's are not retouched or filtered. I took them on my phone camera using the flash!


And some good news! If you want to try this for yourself it's still on sale online at Sam McCauley's! you can buy it Here
Thank you so much for reading and don't be afraid to ask for reviews or thoughts on products and i'll be more than happy to try them out for you!
Have a great week everyone!


I hope you found this post helpful! If you're looking for a new tan or just looking to try out some new products I would highly suggest going for this one! And no better time than when it's on sale!


Thank you all so much for reading! If you have any requests for product reviews make sure and leave me a comment on my Instagram or Facebook!


Monday, 15 February 2016

A Closer Look: The SOSU Complete Contour Palette & How To Use It.


Hey Everybody, Welcome back!

Today I am back with a post on one of the most sought after items in the beauty community in Ireland at the moment, obviously referring to the amazing SOSU Complete Contour Palette by the Beautiful Suzanne Jackson.
As a lot of you might know it is nearly completely sold out at the moment and wont be back in stores until May, but she is putting some on pre-sale tonight on her website to be delivered by March so keep an eye out for that!

Suzanne is really such a huge inspiration and has made such a successful self made career for herself, the second I heard she was releasing her third SOSU product, being the contour palette I just knew It was going to be amazing and high quality, but it's actually more than I expected!

Here is a closer look at the palette and how I use it!


The Packaging is classy, simple and chic! I love it!


The Contents of the palette are 6 shades. 4 creams and 2 powders. It also comes with a step by step guide on the inside which is such a great idea! Inside the palette You get:

- 2 Highlight Creams (Shade 1) (Shade 4 can be used as either a highlight, foundation or Contour colour depending on your skin tone) I adore Shade 1 for carving out my eyebrows!

- 1 Contour Cream (Shade 2)

- 1 Highlight Powder (Shade 3)-To set highlight cream and/or Concealer)

-1 Highlight Cream (Shade 5)-This is intended for the tops of your cheekbones, bridge of the nose, cupids bow etc.)


-1 Contour Powder (Shade 6)-This is to set the areas you contoured with shade 2. This can also be used alone for a softer day time look)

Below is an example of where is best and where I like to apply my contour and highlight creams using the SOSU Complete Contour Palette:


The Broken Dotted lines stand for the cream highlight (Shade 1) You want to focus this colour on the inside of your face to make these features stand out:

-Under Eyes
-Bridge of Nose
Cupids Bow
-Forehead

The Bold Black Lines Stand for the Cream Contour (Shade 2) You want to use this shade to make features recede. If you want to contour your nose you would use this shade to make it appear slimmer and more aligned. I broke my nose when I was 3 and it never set right so I like to contour my nose to give the impression that it's structured. You also want to apply this shade to:

-Underneath Cheekbones
-Temples of Forehead & Hairline
-Sides of Nose, Underneath Jawline (optional)

 Applying a darker shade around the perimeter of the face is going to give the illusion of an Oval face shape, which is what we want!
After applying your creams you then want to blend them all together. I would suggest starting with the dark cream first, that way if you feel its too dark you can lighten it up a bit when blending your highlight cream. 

When finished blending I like to powder my face lightly and then Bake underneath my cheekbones  with a translucent powder and leave it sit there for 5-10 minutes, this cleans up your contour lines a lot and makes them look a lot more precise. I also set underneath my eyes using (Shade 3) to prevent any creasing-which it does an amazing job at! and lighten up the area a bit more. After that I wipe away the translucent powder that was baking and apply the powder contour (Shade 6) to the areas I cream contoured earlier.

I then finished up my makeup as usual and this is how it turned out!


I have to say I am blown away by the quality of this palette! These photos were taken on my Snapchat and have no filters what so ever applied to them, it really just makes your skin look flawless! It is so user friendly and has everything you could need! I never cream contoured before using this palette and it was really so simple! The guide on the inside of the palette will really help if you're not too familiar with contouring.
It caters for day time and night time looks which is fantastic as It cuts down the amount of product's you have to use. I noticed my skin looked flawless after applying this and not one bit cakey which is a bonus!

I believe the palette will be back in stock online and in stores in May. But SOSU.ie will be doing a pre-sale tonight at around 8 P.M. on the palettes and they will be delivered in March!
So I hope this blog post inspires you to give contouring a whack! And I would suggest using this palette 110%. It's caters from beginners to make-up junkies!

 Best of luck to anyone hoping to get their hands on a palette tonight!

Have a great week everyone & Thank you for reading


Sunday, 10 January 2016

My Makeup Removal/Cleansing Routine.


Hey Everyone & Welcome back!

Today's blog is all about makeup removal and cleansing your face!
If I could give anybody the most important tip when it comes to makeup its definitely to get yourself a good cleansing routine and no matter how tired you are always take off your makeup at night to leave your skin breathe and renew itself. I used to have an awful habit of sleeping with my makeup on and it used to cause havoc on my skin!
I suffered from awful texture and bumps and painful breakouts. So I decided to search for cleansing products and build a routine that suits me and that my skin agrees with.


It's all trial and error when it comes to skincare because 1 product isn't going to suit everybody. But I've been using this routine for nearly a year now and my skin has never been better! I still get the monthly breakouts of course but they can also be dealt with! So here is a little bit about my routine!
 
Just a little disclaimer, the majority of these products are all high end but they really are the only ones that agree with my skin. I've tried drugstore and unfortunately my skin just didn't like it! Although these are expensive, they last me for months on end and I really see my skin improve the more I use them! So in my eyes they are worth the money. 

Step 1: Eye Makeup Removal


I like to remove my eye makeup before the rest of my face makeup. I just soak 2 cotton rounds with this fantastic makeup remover, place them on my eyes for a few seconds, then gently rub it in circular motions. I wrote a blogpost about it not so long ago which you read Here . It has everything you need to know along with prices!

Step 2: Cleansing The Face


Next in the routine is a cleanser. There is a variety of cleansers available on the market for all different skin types and skin needs. You can choose from milks, balms, oils, micellar waters etc. I've used them all and I must say this Clarins Cleansing milk is by far my favourite! It smells delicious and removes makeup so easily! It also removes eye makeup but I prefer to use an eye makeup remover! I remove it with a damp Cellulose sponge pictured above. You can buy these pretty much anywhere, these ones are from pennys!

Step 3: Cleansing Face Wash/Exfoliate

Next up is another cleanser, but this time using a foaming cleanser is really going to penetrate deep into your pores and remove any residue that the cleansing milk didn't get to. Double cleansing is really going to make a difference with your skin, so it can breathe properly overnight. Also once or twice a week I love using an exfoliator to remove dead skin cells and build up of makeup from wearing it during the week! This keeps my skin smooth and leaves my makeup application looking flawless.

Step 4: Aftercare


Finally we are going to put back all the moisture into our face that we lost during cleansing. Again this step is all down to personal preference and what your skin needs. I like to use the Clarins Hydraquench lotion, I've noticed since I hit 22 that my skin has been feeling a bit dryer so this really helps keep it fresh and avoids it feeling tight after cleansing. I follow it up with the Vichy Idealia Moisturiser, I love this stuff! It's a really thick consistency and upon application leaves my skin feeling so soft and supple! It leaves a gorgeous glow on the skin as well. Then for my eyes I use Bio-Oil! I was using an eye gel before and I ran out, I didn't use anything on my eyes for a few days and actually noticed the area beginning to look very dry, I also saw a lot of fine lines emerging so, I had a bottle of Bio-Oil lying around and decided to give it a go & I haven't put it down since! My under eye area has never looked plumper amazingly! and the bottle would last you a lifetime. I'd really suggest giving it a go. Finally if I have any face demons I adore using the Vichy Normaderm Hyaluspot! It's a god send. It sting initially for a few minutes, but it takes down the swelling and redness over night and avoids leaving any red marks. A holy grail product!

So that's my skincare/Makeup removal routine! I hope you found it helpful!
If you have any questions please ask me, you can contact me via Instagram, facebook or on this! 

Have a great week everyone!
Until the next time!


XO


Wednesday, 30 December 2015

#Latergram What I Wore & What Products I Used On My Face!

Hey everybody, Welcome back!
I hope you all had an amazing Christmas!

I was definitely the most spoilt girl in east cork Christmas morning! I'm working on a "What I got for Christmas" post, which I hope to be up soon!

Today I'm doing a little outfit post and a list of what makeup I wore to my Boyfriends Christmas party a little over a week ago!


The Dress


You can buy this absolute beaut Here I originally bought it from ASOS But it is a misguided dress. And it's currently on sale with 31% off! It is so worth the money, very classy but edgy. I think the pattern of the crochet feels very balmain-esque! The dress itself is thick luxurious material but so comfortable! Loving it!

The Makeup


Product's Used On My Face:

Base: MUFE Equalizing Primer (Smoothing)
Foundation: Clinique Beyond Perfecting Foundation (Cream Whip)
Concealer: Maybelline Under Eye Eraser (also used to carve out eyebrows)
Setting Powder For Under Eye: Banana Powder from Inglot
Powder: MAC Studo Fix Powder (NC25)
Bronzer: Natural Collection Bronzer (Golden Glow)
Contour: Anastasia Contour Kit (Havana)
Highlight: Sleek highlight Pallette (Solstice)
Blush: Benefit Coralista
Lips: MAC Rubywoo

All Set with MAC Fix+ Setting Spray.

Products Used On Eyes:

Pallete: Morphe 350 Pallette
Eyeliner: NYC Felt Tip Liner
Mascara: Lash Sensational by Maybelline
False Lashes: Eyelure Nadine Lashes
Eyebrows: NYX Auto Brow Pencil (Taupe)
Eyeliner: Rimmel Kohl Liner In Nude


Above are the exact eyeshadow's I used with my eye look, For the shimmering base all over my lid I sprayed my flat brush with a little Fix+ to intensify the shine! It's the second last shadow marked on the 3rd row up from the bottom!

This is my go-to look for a night out, It goes with nearly every lip colour and matches all styles and colours of dresses/jumpsuits etc. There is also no filters applied to any of these photos, it's just how well the foundation, powders etc. photograph!

I hope you enjoyed this post and maybe found a product you'd like to try!
I hope you all have a great and safe new year!

Until the next time!


XO


Friday, 18 December 2015

The Egg White Face Mask


Hey everyone!
Welcome back!

I might be the only one but I'm finding Christmas stressful this year, it might be down to working extra hours and the fact that I'm also doing a course, but tonight I felt like I needed a bit of me time to relax and unwind before the craziness begins at work!

I haven't done a face mask in ages and I'm all out of my mask of magnaminty unfortunately..so I had a brainwave and said I'd try out the egg white facemask and.. I love it! I first heard of this off of Nikki Tutorials and her skin is to die for! so I trusted her opinion, tried it and if I liked it said I'd share it with all of you!

So here is a (short) list of the ingredients needed and a little background on some of the ingredients benefits:

Ingredients

1 egg white

Just crack the egg over a bowl and transfer the yolk back and forth, the egg white should flow into the bowl. The egg whites will nourish and firm your skin, and also tighten your pores.

Lemon Juice


Add 2 teaspoons of lemon juice to the egg white. Either fresh or from a bottle. Personal preference!
Then using a fork, whisk the mixture rapidly until the egg white becomes foamy and frothy. The lemon juice will act as a natural astringent, help tame acne. It also helps to lighten the skin so if you suffer from any acne redness this mask will definitely help with that!

Honey


Then add 1/2 a tablespoon of honey and mix everything again.
Honey is anti-bacterial and also an antiseptic. It also moisturises and nourishes the skin.

After the mask is prepared, wash your face with warm water, this will open up your pores. Apply the mask with your fingers or cotton rounds, maybe hold a towel underneath when applying as this is a runny formula and tends to drip a lot before it dries!

Leave it on for 10-15 Minutes and lie back and relax!
When washing off use warm water and splash it on your face and rub I'm circular motions gently.
Then moisturise and apply your creams as normal. The lemon can be drying so applying moisturiser would be recommended!

I was amazed at how such a simple mask can make my skin feel so refreshed and plump! My pores look smaller and my skin really is glowing after it.
And the best thing is it's so affordable, readily available and fast!

I would really recommend trying this out, I promise you won't regret it!
If you do try it let me know how you get on!

Have a happy and safe Christmas everyone!

Until the next time

XO


Thursday, 10 December 2015

Review - Clinique Beyond Perfecting 2-in-1 Foundation and Concealer


Hey everybody! Welcome back!

I haven't blogged in over a week. I think we can all agree this is the busiest time of year for us all, and balancing a full time job and assignments on top of it makes it hard to sit down and write good quality posts. But I'm going to try my best to get back into my weekly routine!

And this week I have a review on a new foundation I've been using for the past few weeks. It's the Clinique Beyond Perfecting 2-In-1 Foundation And Concealer


This foundation is relatively new to the market and I first heard about it from the amazing Kandee Johnson 


and if you follow or watch her you know, if she likes it, its a must have!
So trusting her word, I ordered one straight away on Brown Thomas and it retails for 33 euro!

I did a bit of hunting of foundation colours and settled on Creamwhip and thankfully it's a perfect match! first off lets have a look at some of the claims for the foundation off Clinique's website!

Benefits: Moisturizing
Skin Types: Works for all skin types.
 Finish: Natural-Matte
Coverage: Full, Moderate to Full

          "A foundation-and-concealer in one for a natural, beyond perfected look that lasts all day. Lightweight, moisturizing makeup covers thoroughly without clogging pores. Skin breathes comfortably, colour stays true, even through sweat and humidity.
Due to the rich pigment level that enhances this flawless coverage makeup, shades may appear deeper when first applied. Once blended completely and allowed to dry, Beyond Perfecting Makeup will melt into your skin for a Beyond Perfected flawless look. A little goes a long way!"

I must say I have to agree with these claims, I am absolutely in love with this foundation! I was a little weary at first due to the unusual packaging, being a doe-foot applicator I thought immediately of it hording bacteria and causing breakouts. But I've been using it for over a month and I haven't notice any problems because of the applicator. I actually grew to love it!

A little really does go a long, long way! It is very pigmented and has a thicker consistency so it also provides a full coverage but it doesn't look cakey and looks pretty natural.
I always set my foundation with powder and apply a primer and I haven't noticed and issues with it breaking up or getting shiny throughout the day. It does leave a glow but you don't look oily!

Here is a picture of all the current shades available!


I think this foundation is going to grow to be one of the best foundations on the market. I'm absolutely in love with it! Here is a picture of my makeup the night I went to the Debenhams Blogger event.  It was on my face at this stage for a total of 11 hours, I just re-powdered and sprayed some Fix+ and I think it held up pretty well!


So girls if your other half is stuck for ideas for Christmas presents you can always send them towards this! or you can always just...


Thanks for reading everyone!
I'll have another post up next week on my skincare/makeup removal routine and all about my favourite products to use.


Have a great and safe weekend!
XO


Thursday, 26 November 2015

Empties Review: The BEST Eye-Makeup Remover on the market for under 5 Euro!


Hey everyone! Welcome back!

I'm back this week with another empties review, and this is about my all time favorite eye-makeup remover. I have used them all. high end and low end and honestly this works just as well (if not better) than all of them and it's a fraction of the price!


It's of course the Nivea Double Effect Eye-Makeup Remover, You can purchase it HERE for only €2.49 at the moment! It's usually €4.99 which is fantastic value!
Let's have a look at some of it's claims:

"NIVEA Daily essentials Double Effective Eye Make-up Remover with a two-phase extra strength formula:
The oil phase effectively removes even waterproof mascara and eye-make-up.
Specially formulated and tested for the sensitive eye area.
The aqueous phase protects and cares for the eye lashes with it's caring formula, without leaving an oily residue."

I have to say I completely agree! first off, I wear eye makeup everyday, shadow, a wing and mascara and what I've found the most effective way to apply the remover is to soak to little cotton rounds and hold them up to my eyes for 10-15 seconds. This will allow the oil to penetrate the makeup so you avoid wiping and dragging afterwards, which can cause premature aging to the eye area, as the skin there is very thin and delicate. After I leave the cotton rounds soak, I very gently make circular motions to remove and stubborn mascara or liner, then softly wipe them outwards and genuinely it removes every trace of makeup! I've used it on standard and waterproof mascara and it works like a charm on both!
It doesn't leave an oily residue afterwards and my eye area feels really soft and supple! If I were wearing heavier eye makeup i'd soak a cotton bud and gently wipe around my lash-line. To continue with eye care after removal, I would suggest applying an eye-cream or oil to keep the area hydrated.
I have tried nearly every high end brand from clarins to even YSL. Although all are great products and effective, This does the job just as well and it's cheap, cheerful and available nearly everywhere!
 I've been using this for months and it never even crossed my mind to blog about it until my boyfriends mam asked me for some suggestions on eye makeup removers as she had just finished a Lancome one, I told her about this and the minute she used it she said I had to write a post about it!
So I would highly highly suggest this to anybody on the hunt for a new eye-makeup remover, or if you're just looking to switch up your routine! And i can guarantee you'll never have this problem again..


Thanks so much for reading everyone!

I hope you all have a fun and safe weekend!

Until the next time, 

XO